

In this tutorial we are gonna build our own Augmented Reality App using Vuforia and Unity, the goal is to track a certain image, load a model that plays a certain sound or play a video directly on top of the image detected.
Installing software
We will be using Unity + Vuforia SDK package + Visual Studio 2019 in this project, now you have to follow through all of these tutorials thoroughly as they are essential for beginners without any programming experience. Please note that the downloads might take very long!
Step 1: Download Unity Hub
Go to https://unity3d.com/get-unity/download and click on Download Unity Hub, then run the .exe file. Click next until the software is installed.

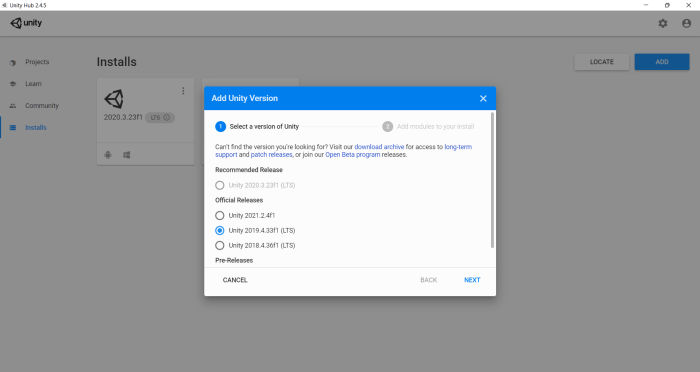
Step 2: Launch Unity Hub
Select the Installs tab, then select the Add button to install version 2020.3.23f1 Unity, this is to ensure minimum errors for library imports.

Select download archive, then select the correct version and click the Unity Hub version. Unity Hub will then request you to select the modules to add, tick the check box for the following:
- Microsoft Visual Studio Community 2019
- Android Build Support
- Windows Build Support (IL2CPP)
then click install, it should take roughly 1 hr at most.
Step 3: Create a Unity Project
Go to Projects tab of Unity Hub, click on the New button and select the 3D template, with a project name and location of your choice.

Once the project is created, it should look like this.

Step 4: Add Vuforia package to unity
Go to https://developer.vuforia.com/downloads/SDK and install the unity package.

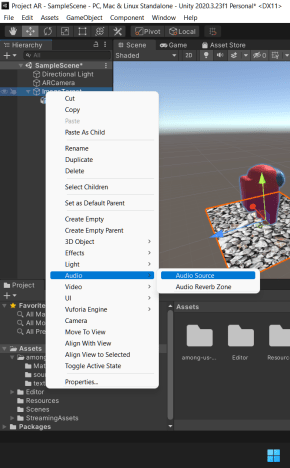
Drag the downloaded unity package into the Assets folder of the project (in unity ui, not windows explorer, or you do it by Assets->Import Package->Custom Package at the tabs on the top similiar to microsoft word file imports), a window will pop out, make sure all the checkboxes are ticked and click Import. You should see a vuforia engine button now available when you right click on the left panel in the image below (left), then create an ImageTarget and an ARCamera.


Step 5: Loading a model to the ImageTarget
Download a fbx model (https://sketchfab.com/3d-models/among-us-low-poly-free-dd1b720336ab455a87cab070d7ccded2), unzip it, drag the fbx folder into the asset section. Then click into the source folder of the fbx folder and drag the fbx model to the image target such that it is the children of it.

Drag the red texture into the AmoungUs model, which then applies the color on it.

Step 6: Configuring Vuforia to detect a certain image
Select ARCamera, under the Inspector tab on the right, select Open Vuforia Engine Configuration,

Click Add License button, and then a browser tab would pop up, requesting you to register an account.

Login into your account, make sure you have License Manager selected then click Get Basic. Give it a name, click the checkbox then click confirm.
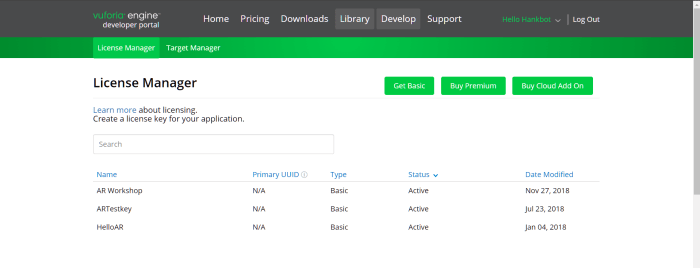
Click into the Project AR License you just created, copy the long text, then paste it into the App License Key in your Unity project under the Inspector tab, where you just selected open vuforia configuration.

Now we got our license, lets create some images for our models to track. Go to Target Manager and click Add Database.

Add these two images into the Database.


Upload the images with the specifications below.

Download the database, it should download as an xxx.unitypackage. Make sure its downloaded with the unity editor option ticked.

Drag the package into the Assets folder similiar to how you did the vuforia package. Select the ImageTarget, under Image Target Behavior (Script), select From Database for Type, the unity package you just imported for Database, and the image you want to track for Image Target.


Step 7: Adjust the Image Target to fit within ARCamera Vision
Select the model and the angle of the model by changing the Rotation/Position values.


Step 8: Click play and point an image towards the camera(could be shown on your phone or printed out). A model should pop out.
Step 9: Play a sound when the model appears.
Create an audio source as a child under the Image Target.
Download the mp3 and drag it into the assets folder, then drag the mp3 file into the AudioClip of the Audio Source.

Now add a script to the ImageTarget by clicking add Component at the Inspector Tab.
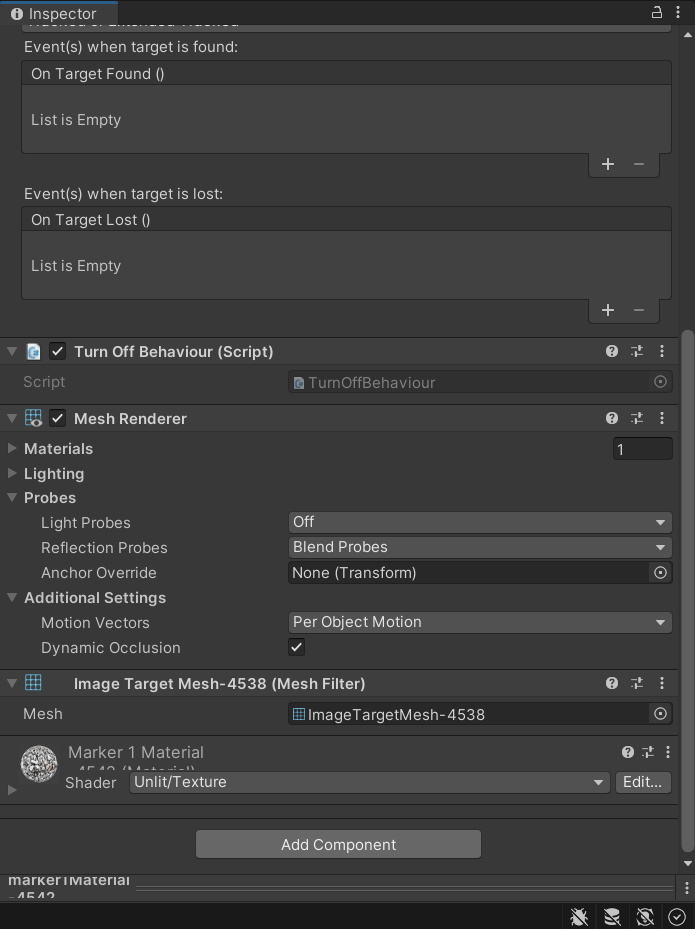
Selecte New script, name it PlaySound then click Creae and Add.


A Play Sound script is added to the Image Target, click on the triple dot on the top right of the tab, and select Edit Script, this launches Visual Studio. Copy paste the code below into PlaySound.cs (note that the class name and the file name must be the same)
using System.Collections;
using System.Collections.Generic;
using UnityEngine;

public class PlaySound : DefaultObserverEventHandler
{
    public AudioSource soundplayer;
    public AudioClip soundclip;
    protected override void OnTrackingFound()
    {
        if (mObserverBehaviour)
        {
            var rendererComponents = mObserverBehaviour.GetComponentsInChildren<Renderer>(true);
            var colliderComponents = mObserverBehaviour.GetComponentsInChildren<Collider>(true);
            var canvasComponents = mObserverBehaviour.GetComponentsInChildren<Canvas>(true);

            // Enable rendering:
            foreach (var component in rendererComponents)
                component.enabled = true;

            // Enable colliders:
            foreach (var component in colliderComponents)
                component.enabled = true;

            // Enable canvas':
            foreach (var component in canvasComponents)
                component.enabled = true;
        }

        OnTargetFound?.Invoke();
        Debug.Log("SUSSSSSSSSSSSS");
        soundplayer.Play();
    }

    protected override void OnTrackingLost()
    {
        if (mObserverBehaviour)
        {
            var rendererComponents = mObserverBehaviour.GetComponentsInChildren<Renderer>(true);
            var colliderComponents = mObserverBehaviour.GetComponentsInChildren<Collider>(true);
            var canvasComponents = mObserverBehaviour.GetComponentsInChildren<Canvas>(true);

            // Disable rendering:
            foreach (var component in rendererComponents)
                component.enabled = false;

            // Disable colliders:
            foreach (var component in colliderComponents)
                component.enabled = false;

            // Disable canvas':
            foreach (var component in canvasComponents)
                component.enabled = false;
        }

        OnTargetLost?.Invoke();

        Debug.Log("NOOOOOOOOOOOO SUSSSSSSSSSSSS");
        soundplayer.Stop();
    }

}
After saving the file, Unity will recompile the script, and the outlook of the script tab will change. Set the status filter to Tracked, select the soundplayer to be Audio Source (which is the child of the image target), and the sound clip to be the mp3 you want to play.

Click the play button and the mp3 will play as soon as the model pops up!
Step 10: Playing video with Image Target
Create a new image target (same database different image), a cube (under 3D object) as a child of the image target. Drag the image targets such that both of them are still within the vision of the ARCamera. (The cube should appear if the right image is shown in front of the camera in play mode)

Change the scale of the cube such that it becomes a very thin rectangle, this will act as a platform to play our video.

Create a video player component in the cube (the platform) just as shown below, untick play on awake and tick the loop option.

Add a video of your choice, or you can download a sample here. Drag it into the Assets folder similar to how you did it to an mp3 file.
Drag the video into the video player in a similar fashion as you would to a sound player.

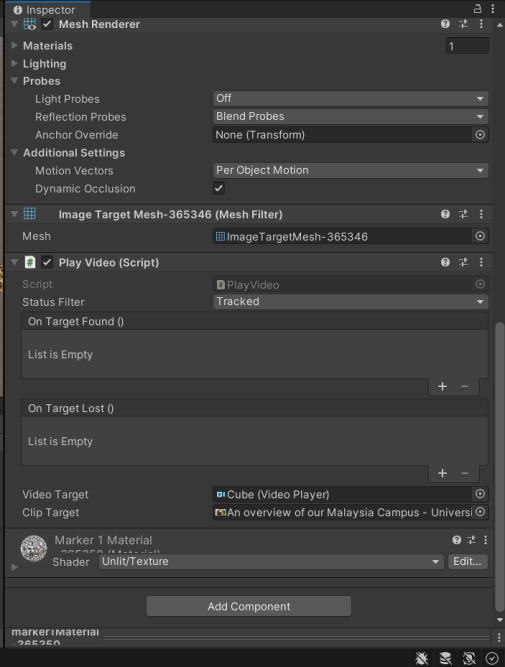
Create a PlayVideo script to your ImageTarget, edit the script and add the script below in Visual Studio:
using System.Collections;
using System.Collections.Generic;
using UnityEngine;
using UnityEngine.Video;

public class PlayVideo : DefaultObserverEventHandler
{
    public VideoPlayer videoTarget;
    public VideoClip clipTarget;
    protected override void OnTrackingFound()
    {
        if (mObserverBehaviour)
        {
            var rendererComponents = mObserverBehaviour.GetComponentsInChildren<Renderer>(true);
            var colliderComponents = mObserverBehaviour.GetComponentsInChildren<Collider>(true);
            var canvasComponents = mObserverBehaviour.GetComponentsInChildren<Canvas>(true);

            // Enable rendering:
            foreach (var component in rendererComponents)
                component.enabled = true;

            // Enable colliders:
            foreach (var component in colliderComponents)
                component.enabled = true;

            // Enable canvas':
            foreach (var component in canvasComponents)
                component.enabled = true;
        }

        OnTargetFound?.Invoke();
        Debug.Log("SUSSSSSSSSSSSS");
        videoTarget.Play();
    }

    protected override void OnTrackingLost()
    {
        if (mObserverBehaviour)
        {
            var rendererComponents = mObserverBehaviour.GetComponentsInChildren<Renderer>(true);
            var colliderComponents = mObserverBehaviour.GetComponentsInChildren<Collider>(true);
            var canvasComponents = mObserverBehaviour.GetComponentsInChildren<Canvas>(true);

            // Disable rendering:
            foreach (var component in rendererComponents)
                component.enabled = false;

            // Disable colliders:
            foreach (var component in colliderComponents)
                component.enabled = false;

            // Disable canvas':
            foreach (var component in canvasComponents)
                component.enabled = false;
        }

        OnTargetLost?.Invoke();

        Debug.Log("NOOOOOOOOOOOO SUSSSSSSSSSSSS");
        videoTarget.Pause();
    }

}
Make sure the status filter is tracked, and the video player and the video clip is selected in the script.
Click play, and now your image targets will play a video when detected! (The video is paused if the image has left the camera)
1 Pingback